Tuesday, July 30, 2013
Elmo Loves
Reese is really into Elmo right now & I found these jammies at Walmart for like $5... Couldnt resist... They were boys, but still couldnt resist! She LOVES, LOVES, LOVES her Elmos!! So I took several pictures of her with her Elmos.
Goodbye More Red!
This is part of my "goodbye country red" saga!! It is also the easiest (in my opinion) and laziest way to make a pillow
I LOVE LOVE LOVE TICKING!! Love it, always have, most likely always will. Ticking has been my one & only stuck with thru the years... Its classic & Its cozy. Anyway, this fabric I bought at Walmart, yep, Walmart... I usually try to support fabric stores & such, but I just "happened" to be in the craft isle & there it was, calling my name!! It was pretty cheap too, so that was even better :)
Ok, so next we'll talk about my sewing machine, my sewing machine is junk & Im sure its junk because of the person operating it. ME!! Well what happened is I somehow bent the needle & havent had the attention span to put a new one in. Plus Im not a great seamstress, my Home- Ec classes are long gone from my memory, yes I can sew a pillow & a button on... Thats about it! So, that being said, I wanted a pillow & I wanted it NOW!! But I was too lazy to mess with my sewing machine... Plus it was 11:00 at night! I do have some of that heat & bond tape stuff, but again, too lazy to get up off the floor in my craft room & get the iron. (I swear Im really not a lazy person, I am a very anxious person & when Im on a mission, Im on a mission!) So my trusty hot glue gun was already plugged in from another project Id been working on, so I thought, well what the heck!! So yep, thats what I did, I hot glued my pillow... Dont ask me how long it'll hold up, Im sure its not a lot different than that heat tape right!?! Well, I guess we shall see!
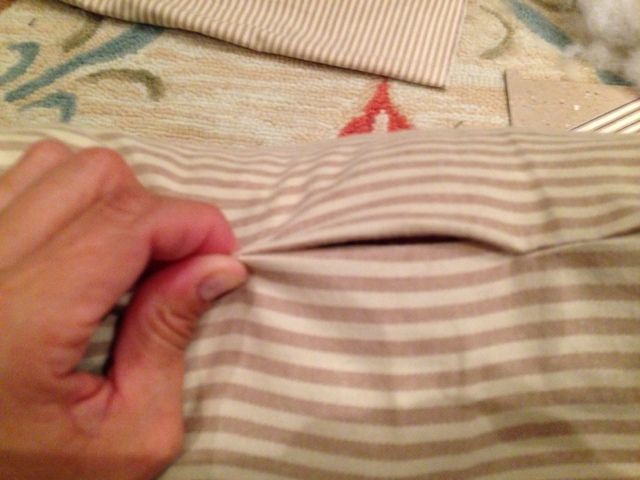
So first I laid my pillow on top of my fabric & cut around it leaving about 2"of slack... I lined one edge up with the fold in the fabric so one side was already done & didnt need glued. Keeping my fabric lined up on the edges, I then ran my hot glue along one side of my fabric & pressed on it for about 30 seconds. **BEFORE you do this you want to make sure you have the outsides together*** so you are hot glueing the inside of the pillow because you turn it inside out!! Make sense??
In my case it did not matter because it was the same on front & back
So, I hot glue 2 sides... 1 side was the fold in the fabric, and you want to leave 1 side open to stuff your pillow in...
It wont look pretty, but you wont see it anyway. Then turn the pillow right side out, & voila!! A beautiful seam! And no one will ever know ;)
At this point you could flap it over & do a cute button or something also..I chose not to for this project...this part is just a little tricky, but not bad. You just have to tuck it in neatly now, because this is the edge that will show.
I work in small sections for this part...
Just tuck & spread the glue down in there & press. Bam! Done! Yay!
Monday, July 29, 2013
Reese's Room
I wanted to share Reese's room with you- its about the only room in the house I am completely satisfied with, so I figured Id share now while its done! Ive really been thinking lately about switching her out of her crib, but I hear to leave them in there as long as you can. So Im already thinking about the next step... Anyway-
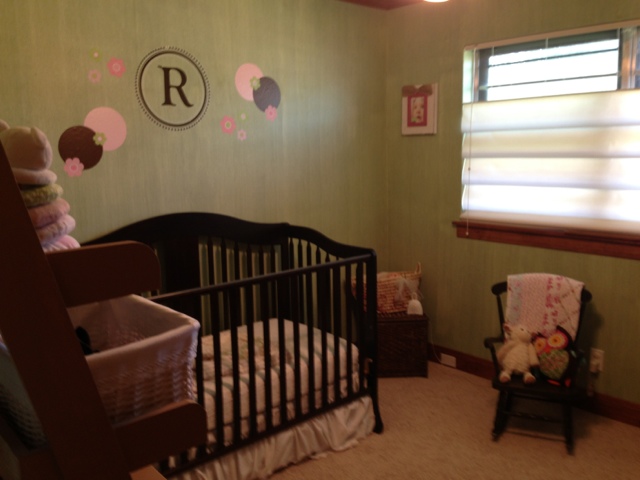
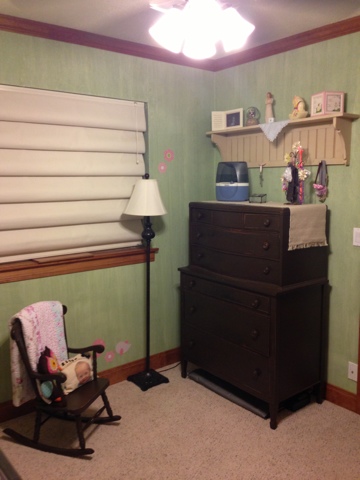
Here's her room at the moment... I actually want to get a valance for her window, So I guess I lied- Its not completely done ( Is it ever!?!)
The room was already done in this color, it was the previous owners little girls room as well, so that worked out perfectly! There is some kind of faux painting technique on the wall- it actually looks more like wallpaper- I believe its called combing.
I think its so cute, I just love her little room!
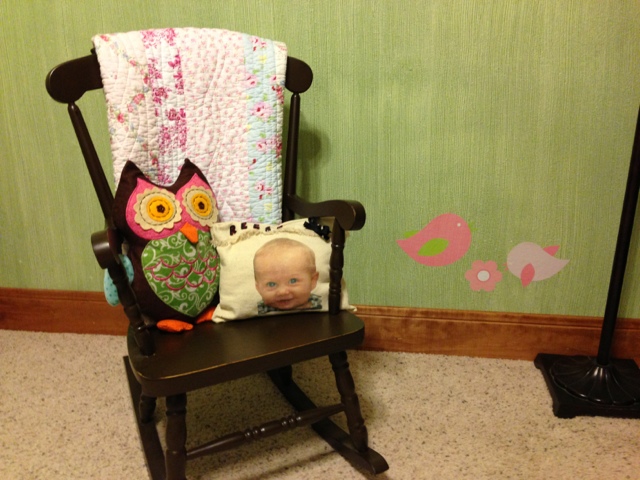
This was my little rocking chair I got on my 1st birthday. The pillow my awesome aunt Jody made for her, shes super creative & cant wait til she starts blogging :)
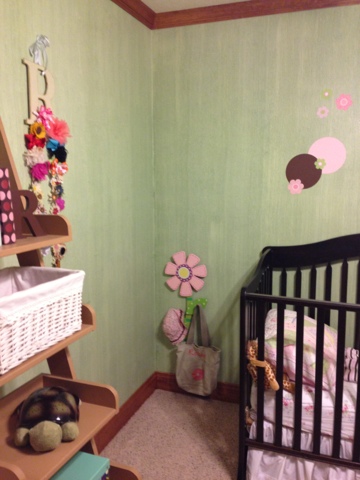
That "R" with the ribbons on it I made to hang her favorite hair pretties... Ill show that later :)
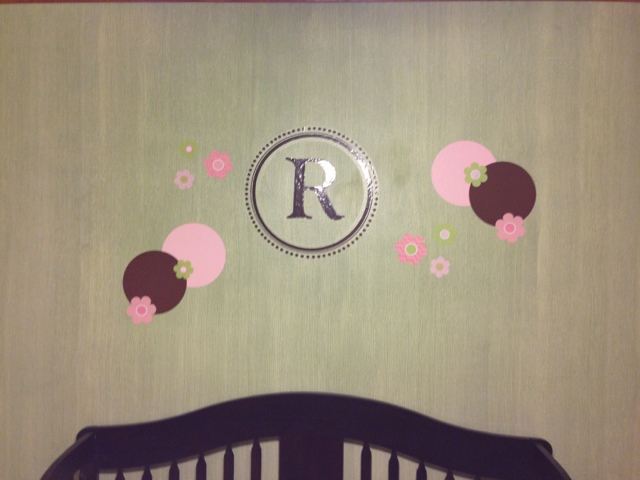
The pink & brown decor is just stickers, the "R" with the circle I got at a shop back in IL & the circles were a gift from a friend back home, who used to have a shop, & the flowers & birds (they were in a pic above) they came from Target. Thanks for looking I hope you enjoyed!
Kelly :)
Saturday, July 27, 2013
Hutch
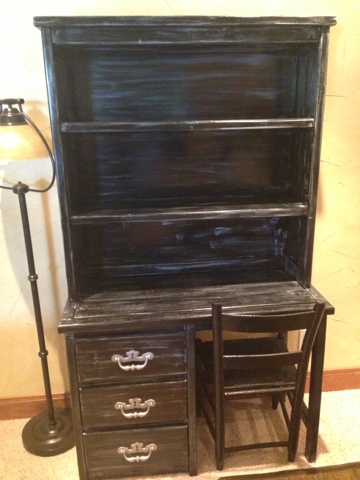
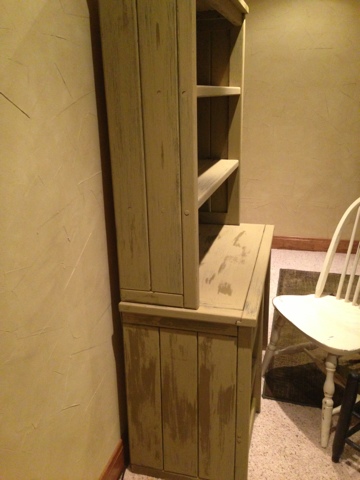
Hey there! I did this project awhile back but I figured Id share with ya. Its back to my dining room dilemma! I found this cabinet/hutch whatever you want to call it- at a little antique store. I wasnt crazy about the paint color or the way it was distressed, but I liked the dimensions of it. I didnt really need much for storage or anything, I just needed something with a little height to go on the wall in my dining room.
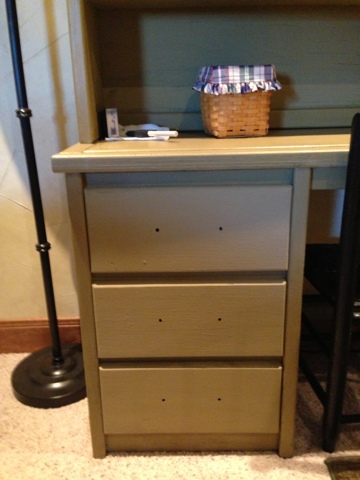
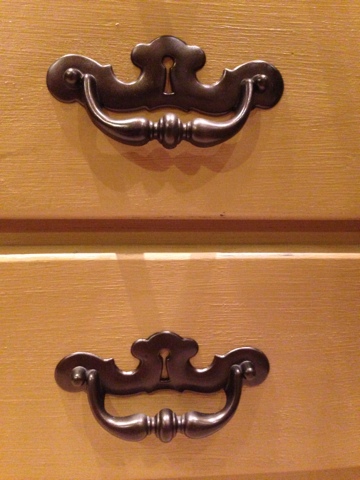
And the hardware on this thing is terrible! Im not even sure what its made of- plastic maybe? Lets just say the picture does it justice!
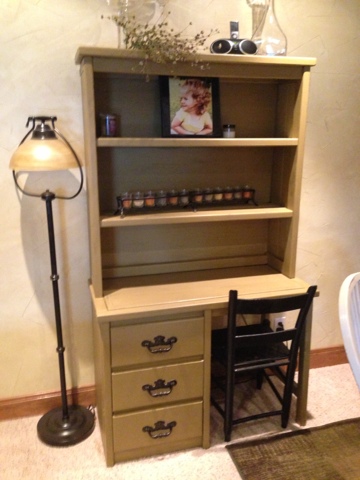
The black is the before...I used this chalk paint I got at a little shop & thought Id try it out... Had to see what all the hype was about!
Thats the color...cinco bayou moss. Its the only brand of chalk paint I had used at the time, so I really didnt know what to compare it to. It is easy to use, no sanding or priming, no voc's & all that other junk. I just brushed it on with a chip brush- which when you use a chip brush it gives some texture to your paint anyway... Then if you want it more distressed you just wipe with a damp rag in the places you wana show some scuffs...
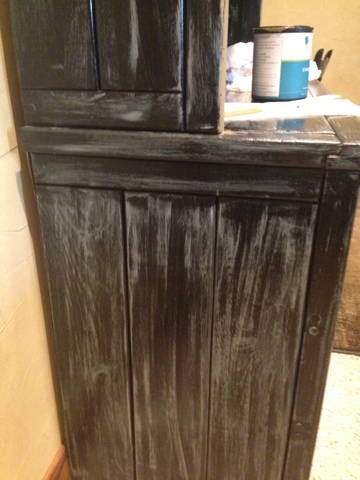
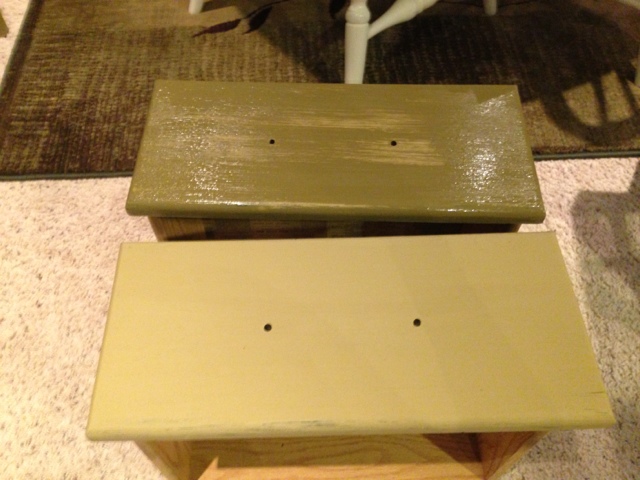
The darker spots are where its still wet.
I let it dry for I dont know how long... I know I put the first coat on while Reese was napping, then put the clear coat on later that night when she went to bed. You dont have to wait that long- like maybe 2hours- unless you have a toddler, then you wait til their in bed. And yes, I did it right there in my dining room- its pretty thick stuff, so it wasnt messy & there is no fumes. So, after paint is done I used this stuff called "endurance finish" its something that goes along with the chalkpaint, I wont buy it again, Ill use polycrylic next time because of the cost.
The darker is whats been "endurance finished" and the drawers are just the plain chalkpaint...
Heres a better one...
Sometime in the middle of all this I took my hardware out to the garage & gave it a good coat of oil rubbed bronze spraypaint- I dont have pics of that one.
But thats it! Pretty easy huh!?! I let it all dry & put the hardware back on
Close up to show that I didnt fully cover the black, I wanted a little character to show through...
Heres a close-up of the hardware... Much better!
Before...
Its the little things :)
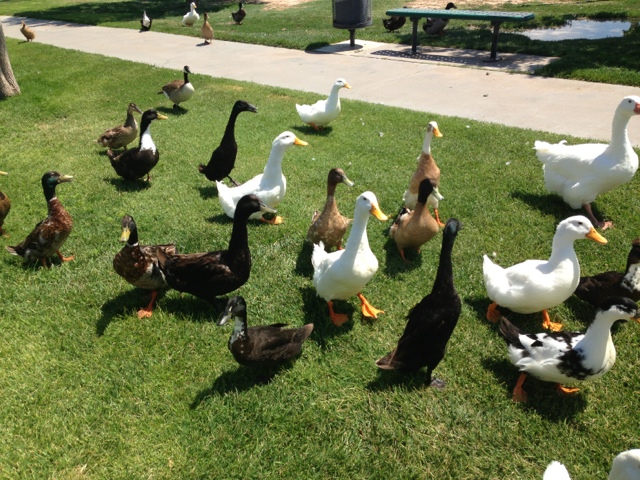
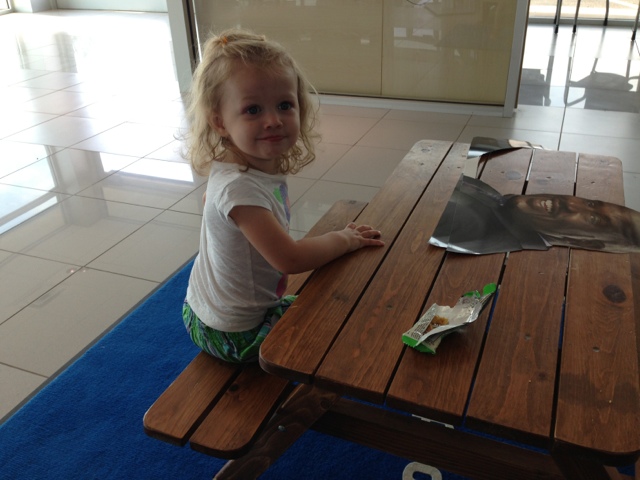
I figured out that Reese is freaked out by birds & ducks. Yesterday I took Reese to the little pond here in town to feed the ducks. We loaded up some bread- she was so excited! I was standing next to the cage taking the pic- lol! I think she was freaked out because it was one of those talking birds! So then she spotted a little picnic table they had in the waiting area & she thought she was pretty big stuff!
The minute we got out of my van....
We were swarmed! Honestly I was a little freaked out too... I thought the little buggers were going to attack us! We had food! She threw one piece of bread & she was outta there! Haha! Then today we were waiting on my van to get an oil change & they had a bird there. This is as close as she got...
 I was standing next to the cage taking the pic- lol! I think she was freaked out because it was one of those talking birds! So then she spotted a little picnic table they had in the waiting area & she thought she was pretty big stuff!
 Hey...whatever keeps em occupied right!
Then we got home & the pastor from our church brought us over a whole bunch of goodies from their garden... Yum!
That was so generous of them to share :)
Then when Will got off of work we headed to Amarillo to do a little shopping. Ive been on a mission for shoes for Reese, her feet have grown 2 sizes in 2 months... I hate spending money on shoes for her! Well what I mean is I hate how I find her a pair of shoes I love but they are $40 or something crazy like that & I know she's going to outgrow them in 10 minutes! I love buying her shoes, but not when I "have" to (like her toes are hanging off the edge "have" to) Ya know what I mean... I like deals! And today I got a deal!
Aren't these the cutest thing ever!?! And they were 40% off too...perfect! Now lets hope they're comfortable! Then Will was at his max of "2 store limit" so shopping trip = over...
Tonight we played outside, Will is re-doing some of our landscaping, and our little helper always has to assist :)
She had her little shovel out & was helping play in the dirt... Then she helped us carry firewood
My little mini me...
Its the little things in life... Like the ducks, or the caring people who bring you vegetables from the garden, or even the little picnic table. I am feeling so blessed in my life right now, I cant explain it... Maybe since we've moved & Ive had more alone time, since I dont have any family or friends (like friends that Ive known for a long time) here, maybe that makes me appreciate those little things more, sure somedays get a little boring, but I do know Ill never get this day back so Im going to cherish all the little memories we had today :) xoxo
Friday, July 26, 2013
My "Longaberger" Basket Make-Over
P.S... My moms going to kill me for this!
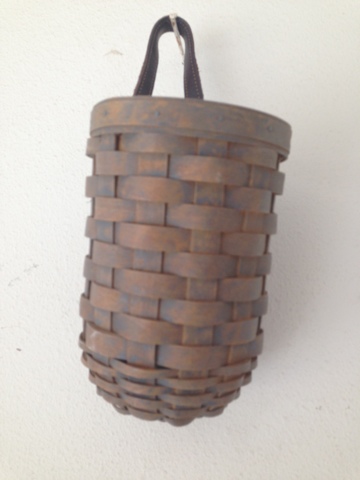
Here's my original basket...
Its cute right!?! Its my favorite :) I love the little leather strap! This is the after...
Im sure the Longaberger collectors out there are freaking out right now... Yep- I spray painted my Longaberger basket. And Im sorry but this really is a terrible picture of it... It looks better in real life. Its actually gray, but in the picture it looks blue. Here's what I used...
Found it at Michaels in the clearance section...Its actually spray stain- not spray paint... I sprayed it on...
Let it sit for a few... Then took a rag & just blotted it off... Pretty simple!
Waited for it to dry & here's the current situation of it...I know Ive probably ruined a "collectable" that could've been worth money someday...but for now- it suits my needs much better :)
Im sharing this on....Chair Transformation
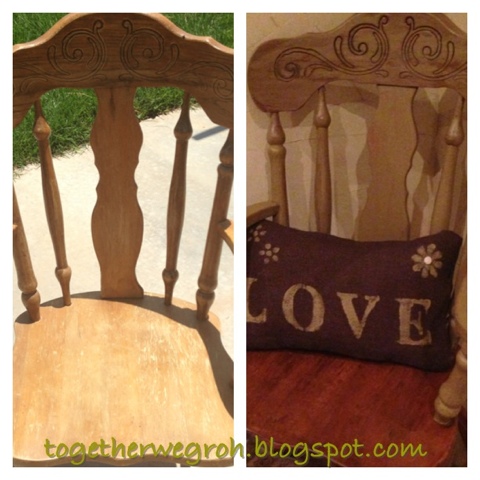
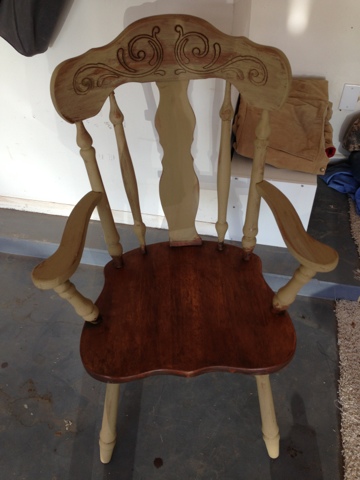
Hi All! I just wanted to share this chair I got at a rummage sale for $1!!
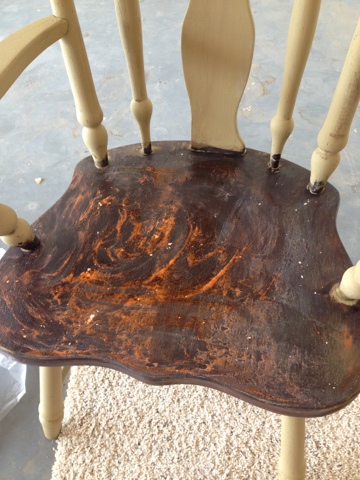
I stained the seat dark with my Java gel stain I had left over from my previous table project. I decided I didnt like it that dark...
So I stripped it... Sheesh what a mess- I shouldve just left it alone, but no... Live & learn, right!?! So after the stripper did its thing I wiped it all down & put a lighter stain on it...
http://www.greenwillowpond.com/
Here's a side by side of the before & after... Just wait- it gets good!!
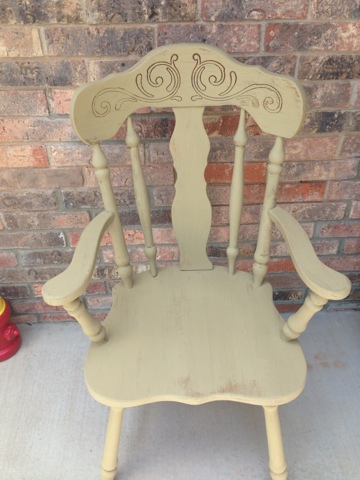
So I went home & slapped my chalk paint on it...
Bam- took me 10 min & done! But of course I wasnt satisfied with it... Too boring all one color & of course I have to make everything more difficult than it really needs to be! So I did this...
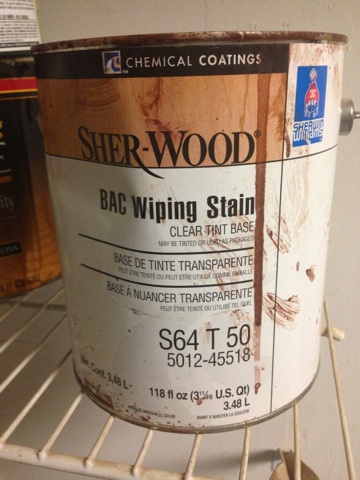
It was left in the garage... Its more of a medium honey color & matches all our doors & woodwork in the house. I put it on, let it sit a few, wiped it off, put another coat on, let it sit, etc. until I got the shade I was looking for. This regular stain is so different then the gel stain Im used to working with, its a lot more runny & took a lot more coats to get the look I was going for. But, its done!! I used my polycrylic as well just on the seat for a little protection. It turned out like I was wanting, I just wish my little 3 step project didnt turn into 10, but hey! Thats how ya learn right :)
Here's the finished project...
Sorry my lightings not very good, I took the pictures in my garage at like midnight :/ Im really into this two toned look right now. And I like it with my table transformation!
Ill show ya how I made that pillow next time!!
Thanks for stopping by :)
Im linking up with:
http://www.greenwillowpond.com/
http://www.farmhouseporch.blogspot.com/
Subscribe to:
Posts (Atom)

