So I've had alot of questions about my cabinets, so here's the step by step of how I did it all.
First off... Supplies.
Have all your stuff on hand so you are ready to go with no interruptions.
- primer (I used a bonding primer) It doesnt matter what kind or brand- Ive used Kilz, Zinsser, etc. they are all about the same.
This bonding primer however says you dont have to sand & it says for glossy surfaces...
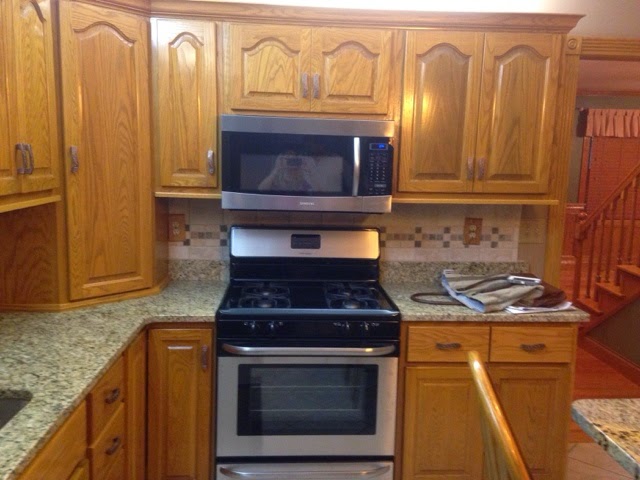
I'd say we've got some gloss going on!!
- paint (dont go cheap on this, no matter what brand you get or where you get it from get the top of the line- Benjamin Moore is probably my favorite- It'll cost ya about $60/gallon-I did get the contactor price on it before & it was cheaper... I used Valspar Reserve brand for this project- it was $40/gallon. Maybe its not important to use good paint, I dont know, but Im not going through all this hard work & have to redo it later)
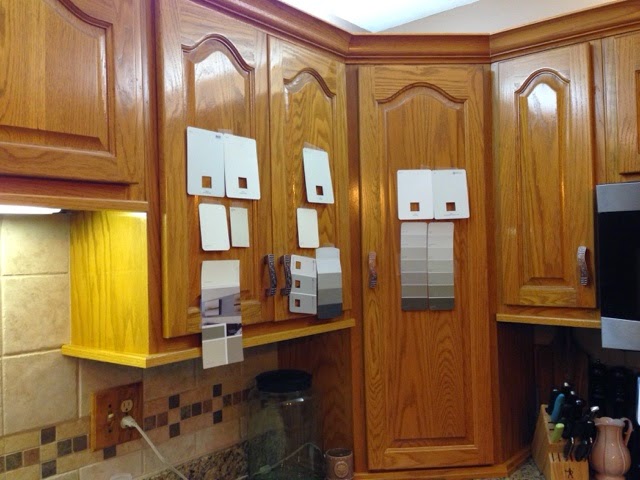
The paint color I chose was Paramount White in Satin. Like I said in my previous post... Choose paint colors at home in your own lighting- it makes a HUGE difference!
My method was to tape samples to the cabinets & step back to compare :)
-paint brush... I used an angled 1&1/2- again get a decent one.. Mine was around $8.00
-paint tray
-Sanding blocks (med/fine grit) just in case you have a rough spot or some stubborn grease that wont come off & touch ups for later
-foam roller & frame (I had 2 brushes & rollers- one for paint & one for primer)
-Clorox/Lysol whatever brand Wipes
-Misc/optional...drop cloth (I used boxes since we had just moved & had several on hand) painters tape, drill- to remove hardware,spray paint if you want to paint your hardware.
- Remove all the hardware from each door & drawer & place in a ziploc bag or a bowl (seriously do this because things will get messy & they will get lost)
- Remove the cabinet doors from the hinges. I left the hinges on each cabinet, just detached the doors.
EXCEPT...
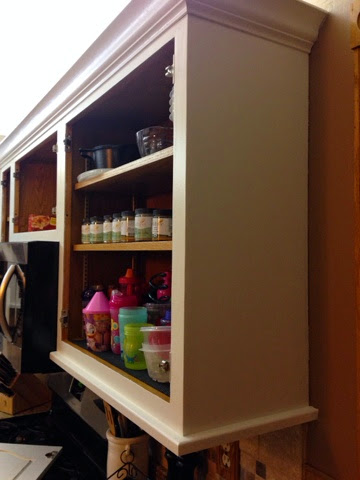
Above my sink... I decided I wanted this cubby to stay open, then remove all hinges & putty/caulk in where the screw holes were
Also place these pieces in a bowl or bag so you can find them later. I did not paint the insides of my cabinets,(except for the open one) so I left everything in there. I did however take everything out of the drawers.
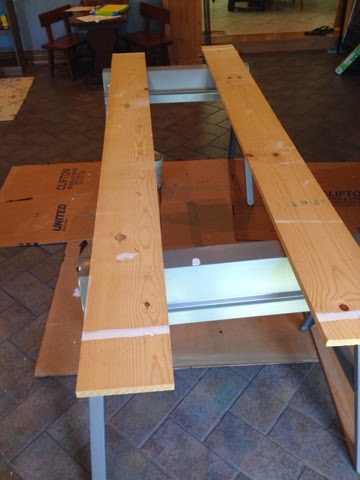
- Set up sawhorses with boards on them or just boards on the floor to have something to set your cabinet doors up on
- Lay out your doors on the sawhorses & wipe them all down with your wipes- if you choose to sand- then do that first, then wipe off with the wipes. The wipes help get all the dirt, grease, & dust off.
**I did do a light sand on my first few cabinets & then I remembered the paint counter guy said with this primer you dont have to sand or remove any gloss. Sure enough the directions on the can said the same. So I decided I was happy with no sanding! **
Put on your 1st coat of primer. I started with the back side of the cabinets, then flipped to the front. After priming, I put my first coat on the back also, that way the front of the cabinets wouldn't have to be facedown, so I would have less flaws that way.
Your house will be a disaster for a few days...
After my priming was done, I primed & painted the bases of the cabinets & trim.
I wiped all of these down before painting as well.
The primer dries pretty quickly, so I was able to prime front & back sides & the get a coat of paint on the back sides of the cabinets all in the same day. So the next day I just had to do the fronts of the cabinets. I only did one coat of paint on the back of the doors, but I did two coats on the outsides of the doors.
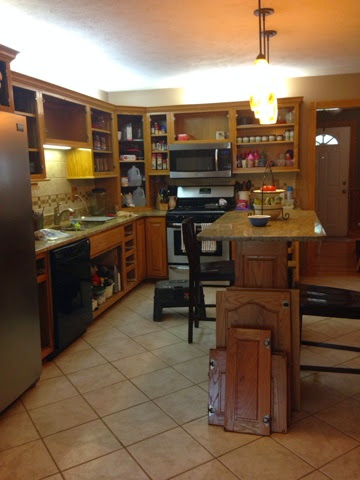
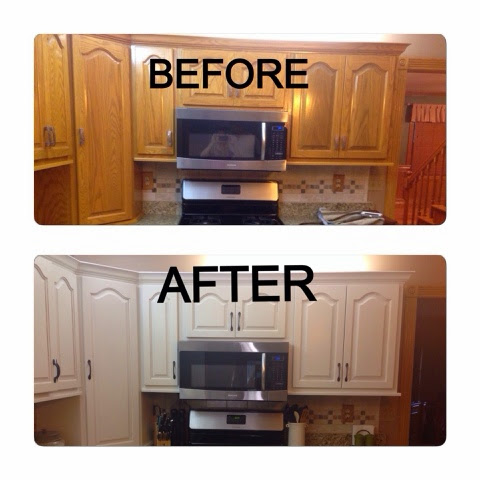
BEFORE...
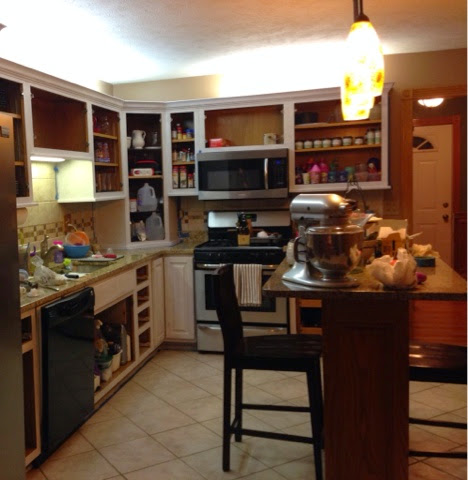
AFTER...
You will have places you have to go back & touch up on- especially when you go to hang them back up, I had a few little dings here & there. Mostly because I didnt have the patience to wait & have somebody help me.. Oops :-/
I also did a glazing on the cabinets as well, I will do a new post on that. I did not do any kind of polyurethane or sealer over the top. I have used poly on a few things painted white in the past & I've always had them turn yellowish, so I would rather skip that part.
Im SO happy with the way they turned out, and yes it is hard work & yes you'll never want to see another cabinet door as long as you live, but its SO worth it & its only for a short time!
I hope I've covered everything, please feel free if you have any questions, ask away! I'd be glad to help as best I can!
Thanks as always for looking!!
Kelly :)


