Thursday, September 4, 2014

All The Details


   So I've had alot of questions about my cabinets, so here's the step by step of how I did it all. 
   First off... Supplies.
Have all your stuff on hand so you are ready to go with no interruptions. 

- primer (I used a bonding primer) It doesnt matter what kind or brand- Ive used Kilz, Zinsser, etc. they are all about the same.

This bonding primer however says you dont have to sand & it says for glossy surfaces... 

I'd say we've got some gloss going on!! 

- paint (dont go cheap on this, no matter what brand you get or where you get it from get the top of the line- Benjamin Moore is probably my favorite- It'll cost ya about $60/gallon-I did get the contactor price on it before & it was cheaper... I used Valspar Reserve brand for this project- it was $40/gallon. Maybe its not important to use good paint, I dont know, but Im not going through all this hard work & have to redo it later) 

The paint color I chose was Paramount White in Satin. Like I said in my previous post... Choose paint colors at home in your own lighting- it makes a HUGE difference! 
My method was to tape samples to the cabinets & step back to compare :) 

-paint brush... I used an angled 1&1/2- again get a decent one.. Mine was around $8.00
-paint tray
-Sanding blocks (med/fine grit) just in case you have a rough spot or some stubborn grease that wont come off & touch ups for later
-foam roller & frame (I had 2 brushes & rollers- one for paint & one for primer) 
-Clorox/Lysol whatever brand Wipes
-Misc/optional...drop cloth (I used boxes since we had just moved & had several on hand) painters tape, drill- to remove hardware,spray paint if you want to paint your hardware. 

- Remove all the hardware from each door & drawer & place in a ziploc bag or a bowl (seriously do this because things will get messy & they will get lost) 
- Remove the cabinet doors from the hinges. I left the hinges on each cabinet, just detached the doors. 

EXCEPT... 
Above my sink... I decided I wanted this cubby to stay open, then remove all hinges & putty/caulk in where the screw holes were 


 Also place these pieces in a bowl or bag so you can find them later. I did not paint the insides of my cabinets,(except for the open one)  so I left everything in there. I did however take everything out of the drawers. 

- Set up sawhorses with boards on them or just boards on the floor to have something to set your cabinet doors up on 

- Lay out your doors on the sawhorses & wipe them all down with your wipes- if you choose to sand- then do that first, then wipe off with the wipes. The wipes help get all the dirt, grease, & dust off. 

**I did do a light sand on my first few cabinets & then I remembered the paint counter guy said with this primer you dont have to sand or remove any gloss. Sure enough the directions on the can said the same. So I decided I was happy with no sanding! **

Put on your 1st coat of primer. I started with the back side of the cabinets, then flipped to the front. After priming, I put my first coat on the back also, that way the front of the cabinets wouldn't have to be facedown, so I would have less flaws that way. 
Your house will be a disaster for a few days...  

After my priming was done, I primed & painted the bases of the cabinets & trim. 
I wiped all of these down before painting as well. 


The primer dries pretty quickly, so I was able to prime front & back sides & the get a coat of paint on the back sides of the cabinets all in the same day. So the next day I just had to do the fronts of the cabinets. I only did one coat of paint on the back of the doors, but I did two coats on the outsides of the doors. 

BEFORE... 

AFTER... 

You will have places you have to go back & touch up on- especially when you go to hang them back up, I had a few little dings here & there. Mostly because I didnt have the patience to wait & have somebody help me.. Oops :-/ 

I also did a glazing on the cabinets as well, I will do a new post on that. I did not do any kind of polyurethane or sealer over the top. I have used poly on a few things painted white in the past & I've always had them turn yellowish, so I would rather skip that part. 
Im SO happy with the way they turned out, and yes it is hard work & yes you'll never want to see another cabinet door as long as you live, but its SO worth it & its only for a short time! 
I hope I've covered everything, please feel free if you have any questions, ask away! I'd be glad to help as best I can! 

Thanks as always for looking!! 
Kelly :) 

Monday, September 1, 2014

Work In Progress

  I wanted to share my kitchen progress so far. Im SO excited to get it all put back together (which will be very soon!) It already feels like somebody came in & turned on the lights- its so much brighter in my kitchen now & once I get the doors put back on it will brighten the room up even more. 


All the cabinets are primed & painted... 
Ive got cabinets everywhere!! Im glad I have alot of room in this family room because its been so humid out in the garage my paint would never dry! 
Such a mess! 
Remember the oak door... 
Here it is waiting to dry... 

I decided Im going to leave off the cabinet doors above the kitchen sink to open it up a bit... 
I think it'll be a cute cubby to decorate :) 

So now I've got some "practice" doors to play with... 
 I was trying to decide how much distressing/glazing I wanted- the one on the left is just painted, the one on the right I love, but I'm thinking its a little too much for my house. So I decided to go with this look... 
I had a hard time with the glazing- I didnt want my pretty freshly painted cabinets to look dirty. 
And last the hardware... 
After scrubbing them all in hot soapy water I lined them all up including the handle & hinges from the door. 
Then sprayed them down with oil rubbed bronze spray paint. This sprayer is my favorite to work with- its so easy & Ive never had problems with drips or it not spraying out evenly... It works like a charm :) 
I will spray them down here in a bit with a matte top coat for protection & they will be done! Super quick & easy project & it saved me a TON of money not buying all new hardware! 
More pics to follow! Thanks as always for looking! 

Kelly :)


Sunday, August 31, 2014

Kitchen Plans


   Hope you all are doing good! Im in the middle of tearing apart my kitchen, but before I get to the good stuff I want to show what I have planned for this kitchen. 
  First off... The Island! 
I know, I know... "What's wrong with it?!?" 
Nothing is "wrong" with it... Its me- I'm crazy! (I know that's really what people think when I say I want to get rid of it.) I would just rather have something with drawers & cabinets for more storage is all.
So the plan... Hopefully move it out in one piece & design a new one :)
(Oh & to do this without spending any or much money because I dont have a job remember- haha!) 

Next off... Paint the cabinets! 

Like I had mentioned in my previous post- too much oak. I just LOVE white cabinets. I know some people cringe at the thought of painting beautiful wood, but this just isnt me. 

The hardware! 
I know I mentioned this in my previous post as well... But these had to go! 
 
And actually I was talking to my mother & father in law the other day about our kitchen & they had their old cabinet hardware that they gave to me... Cant beat FREE!! By the way, have you priced hardware lately?!? Good grief, I was trying to go cheap & they were still $3 & something for one! The ones I really liked were $5 or $7 or something like that, but there is no way! I needed 37 of them! Luckily my inlaws had 38 & they just happened to be the same size I needed.... Its my lucky day :) 

And lastly... The pantry! 
Im excited about this part! Well Im excited about it all, but I know how the other part will turn out- its a "been there, done that" kinda project since I've painted my kitchen cabinets before. 
Anyway! Ive got a visual in my mind how I want this to turn out, so hopefully it works! 
The pantry is the recessed area of cabinets. Unfortunately the first door is just a furnace closet.
I've decided I want that to look like a built in piece of furniture, like a hutch. So my plan is to either... 
A) take off the upper cabinet doors & leave an open space up there for glass, pretty dishes to display, etc. That will be the cheapest way... 
                        OR
B) is to take out the top panel of the big doors & add glass. If I can do it myself or find someone that will for a reasonable cost I will do that, we shall see. 

Either way this whole set of cabinets will be stained dark... Not painted white like my cabinets. My goal is to make it look like an antique hutch. 

I'll keep ya posted!! 

Kelly :) 


New house- phase 1... Kitchen

            Hey all! 
   We got moved in our new house last Friday & I've been busy getting everything unpacked, which has gone surprisingly well with the two little ones. 
   My mom came down for a visit this weekend & I wasn't planning on tackling any projects just yet (I was wanting to get everything organized before I made more messes) because chaos makes me crazy! BUT... She was willing to watch the little ones day & night while I worked away trying to get the majority of it done while she was here. So I decided lets do this & tore right into it! 
   Our new house doesn't need alot... Mostly just paint & I want to update a few odds & end things (well let me rephrase that... Does anything I ever do a NEED!?!)  Im just not happy unless I can redo something ;) 
   Anyway... So the first thing... Kitchen! The cabinet color just wasnt appealing to me & I knew I wanted to change it first. 
The quality of these pictures are not so great... 
The countertops look a little green in the pictures, but they are actually more of a creme & brown. 
Thats better! 
There is alot of oak going on in here... 
Some of the oaks dont match either :( 
Oh & the hardware!! 😁 No offense if anyone has this, its just not my style... At all... Lets get a close up of these babies!! 
However, one mans junk is another mans treasure... I sold these the next day on craigslist to a nice lady that may have big plans to make them pretty :) Who woulda thought!?! 
Anyway... 
Figuring out my paint samples :)          Whatever you do always pick your color at home! And DO NOT I repeat DO NOT even attempt to look at paint samples at the store after you have chose your color at home!! TRUST ME! You'll go crazy, you will second guess your color choice & you will want to change your mind again & again. I have FINALLY learned after several hundred paint cans (probably more than that actually, I have painted ALOT in my lifetime) take the time to do this step! 
I am THRILLED with my paint color I chose for the cabinets. Im so thrilled with it I walked off & left my paint sample at the paint counter... But you'll see it soon enough :) 
Cant wait for that!! 


Kelly :) 


Wednesday, August 13, 2014

Knock On Wood!

   Well... I should have just knocked on wood... My last post... (which was forever ago now-trust me I know my blog has been abandoned!) My last post was about Texas, how we loved it here, etc.etc. Well a few weeks back my husband was offered a job in Illinois around the Springfield area (actually it was July 15th- 2 days after we had got back from vacation up there visiting family & friends) It would have been just a bit more convienient if we had known about the move when we were up there visiting but ya know... Whats another 14 hours one-way in the car with a 2 year old & a newborn- ha! Actually they are really good travelers, but its no fun for anyone being in a car that long. 


So we turned around about a week later & headed back up to Illinois to house hunt. 
We looked at 21 houses in a day & a half.
It didnt quite work out as well as when we moved to Texas. When we were house hunting here we were both pretty sure from the pictures on the internet which house we wanted & when we came to look sure enough it was the one! Well... This time around we thought we had the one, well when we looked at "the one" it just wasnt the one. So back to the drawing board.... 
We weren't expecting to look at so many houses, but we just weren't having any luck. Finally we found one we liked... Well my husband liked. I liked it, but I wasn't in love... Ya know the feeling of "ya know when you know" I didnt have that excited, oh my gosh this is it! You get the idea....
We left the house he liked & still had one more to look at. My stomach was in knots... He was like "no this house is perfect, lets just make an offer, we've looked at tons of houses lets just buy this one," etc... 
Until we got to "our" house... The LAST & final of 21 houses. I LOVE the cape cod style of houses, but the pictures on the listing did not do it any justice at all! I never would have guessed it was as nice on the inside as it is. There are a few things Im going to do to it (of course, right?!?)  So here's a sneak peek... 
Its just the perfect house for us! All of the houses we looked at were either WAY too big or "if this one just had a toyroom or a den..." It was one extreme or the other. 
We are going to miss Texas dearly. We have been so blessed here & have met so many amazing people, but we do also know the importance of being close to family, so it is bittersweet. But just as when we moved here it seems like this is the path that God has chosen for us, it has all fallen into place. 
So... Stay tuned for the good stuff! 

Kelly :)

Friday, June 6, 2014

One year already!!

Wow! Has it really been a year already!?! 

Today marks my (I say my because Will was here a couple weeks before me) one year anniversary of moving to Texas. We have been so blessed to meet so many wonderful, caring people- total strangers who have gone out of their way & now have become forever friends. We have a wonderful church that we absolutely LOVE... Great neighbors that we've become close to that treat our children like their own grandchildren & we have been blessed with another beautiful baby girl. Sure its hard being away from family, & we left alot of great friends as well... we moved here without knowing a single person or really anything about the town. Our marriage has grown stronger, my faith has grown stronger, I feel like Im a better wife & mom, I feel like Ive stepped away from the negativity in my life & focused more on the positive. Thank you God for bringing us here... And thank you Texas for being so good to us! 


Wednesday, May 21, 2014

Everly's Nursery

Well my baby is now 3 weeks old & I realized... I never shared the final nursery! 
So... Here it is! 
I didnt really have a "theme." I guess you could say its just girly... Maybe a little vintage :) 
The bedding is the same I had for Reese when she was a baby. 
And yes all of this will be removed when she acually starts sleeping in her crib, right now she sleeps in our room... 
My ladder shelf for storage... 
And a headband holder I made out if an oatmeal can (I needed to make about 6 of these with having 2 girls!) Gotta have our accessories :) 
The rocking chair was a gift from my family & the quilt was also a gift my sister in law gave me, both when I had Reese, so I passed it along to use for Everly. 
I wasnt sad when I found out we were having another girl because I had so much cute stuff, this way I get to use it all again! 
Trunks for storage... I had to spruce them up a bit to go with the nursery. Someday I'll get around to that post! 
Her little ultrasound picture :) Look at those cheeks! 

Lampshade I painted... 
Storage baskets to hang on the wall above the dresser/changing table. These came from World Market, as well as the little chalkboards. I just painted those as well to match the lampshade :) 

Remember this dresser from forever ago!?! Well about 3 days before I had Everly I decided to take it out of the dining room & repaint it... Talk about nesting! 
One of our maternity pictures I hung in her room... 
Sorry this ones blurry :( 


An old laundry basket I found at an antique mall to store stuffed animals in. 
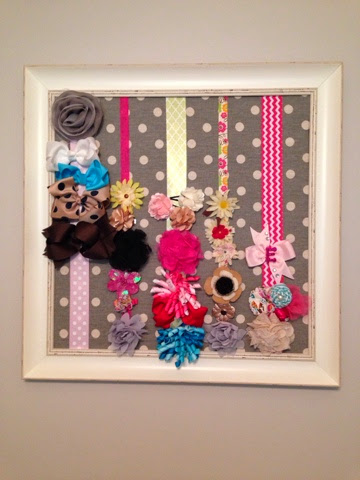
And a bow holder I also made (Im still working on that post!) 

I love her little nursery & am satisfied with the way it turned out. Its just a pretty little room :) 
Thanks as always for looking! 

Kelly :)